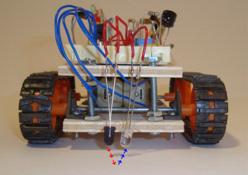
As you may
recall, I was working on detecting a candle flame using a Game Boy camera interfaced to an ATmega328P (in the form of a Solarbotics
Ardweeny) coded in the Arduino IDE.
The AVR's onboard analog-to-digital converter is very slow. Too slow even for very low resolution (128x123) image capture. Frame rate was around 0.25 - 0.5 fps (that's one frame every 2-4 seconds).
Instead of adding an external ADC (I'll try that later), the simplest option for speeding up the frame rate was to use the MCU's built in analog comparator. Since the system only had to detect a bright spot, an 8-bit greyscale capture was unnecessary.
The AVR comparator sets one of the register bits high if the input voltage (typically the
AIN1 pin) exceeds the reference voltage (the
AIN0 pin) and sets it low if not.
Doing so takes a measly 1-2 clock cycles. At 16MHz that's 0.125 µsec, which is several orders of magnitude faster than the ADC. For example, using the Arduino analogRead() function takes 100 µsec. To maximize the frame rate there was a few more tricks to implement. But first...
AVR Analog Comparator
Here's how to use the basic features of the AVR analog comparator. The AVR has two pins, AIN0, the positive input for the comparator and AIN1, the negative input. Optionally you can use any of the other ADC pins for the negative input, but let's focus on the simple solution, using AIN1.
To set things up (don't panic, code will follow shortly)...
- Set up the AIN0 (PD6) and AIN1 (PD7) pins for input
- Enable the ADC -- and/or set ADEN (ADC enable) in the ADCSRA register
- Enable the comparator -- clear ACD (analog comparator disable) in the ACSR (analog comparator control and status register)
- Disable the comparator multiplexer -- clear ACME (analog comparator multiplex enable) in the ADCSRB register.
- Disable interrupts for the analog comparator -- clear ACIE in the ACSR.
The simple answer is to set all three registers' bits to 0 except set ADEN which I presume allows you to continue to use the ADC normally if needed. Here's the C code:
// Initialize Comparator - obviously this is done differently for AVR
pinMode(6, INPUT);
pinMode(7, INPUT);
// ACD=0, ACBG=0, ACO=0 ACI=0 ACIE=0 ACIC=0 ACIS1, ACIS0
// - interrupt on output toggle
ACSR = 0b00000000;
// ADEN=1
ADCSRA = 0b10000000;
// ACME=0 (on) ADEN=0 MUX = b000 for use of AIN1
ADCSRB = 0b00000000;
Using the comparator substantially increased frame rate... to about 1 fps. But it was still a little too slow, primarily because of the object detection being performed on the AVR.
The Final Tricks
A high frame rate, or even 10fps would've been nice to achieve. But for purposes of aiming the firefighting robot at a candle, a sad 3 fps was acceptable.
Getting to that level of "performance" involved code tuning, which consisted of reducing and optimizing the machine code between the clock pulses sent to the camera, and reducing the size of the code as much as possible, and finally eliminating parts of the code.
Simple Machine Code Optimization
My simple process for optimizing machine code of compiled Arduino source is as follows:
- Compile within the Arduino IDE,
- Generating an assembly file from the command line (Cygwin in this case
- Count instructions and look at data references.
- Change code to try and reduce instructions
- Change the way data is referenced (e.g., several arrays or array of struct; copy point to local variable)
- Repeat process to see if changes reduced the instruction count
Nothing sophisticated, mind you. Just a question of trying different ways to reference data structures and write code that reduced assembly instructions. This helped a little.
To do it, you'll need to run the
avr-objdump command on the elf file generated by the Arduino IDE compiler. The elf file can be found in the applet subdirectory of your project. The command to run is:
avr-objdump -S project.cpp.elf > project.S
You can then edit the .S (assembly) file to count instructions. Source code appears as comments in the assembly file to make it easier to locate relevant code. For example:
// Continue reading the rest of the pixels and flood fill to detect bright objects
// The camera seems to be spitting out 128x128 even though the final 5 rows are junk
for (y = 0; y < 123; y++) {
if (y < 16)
972: 10 31 cpi r17, 0x10 ; 16
974: 10 f4 brcc .+4 ; 0x97a <__stack+0x7b>
sbi(CAM_LED_PORT, CAM_LED_BIT);
976: 5d 9a sbi 0x0b, 5 ; 11
978: 01 c0 rjmp .+2 ; 0x97c <__stack+0x7d>
else
cbi(CAM_LED_PORT, CAM_LED_BIT);
97a: 5d 98 cbi 0x0b, 5 ; 11
97c: 24 2f mov r18, r20
97e: 50 e0 ldi r21, 0x00 ; 0
980: 71 e0 ldi r23, 0x01 ; 1
The big difference came when I eliminated the part of the object detection code that attempted to merge nearby objects on the fly during capture. That work is now done after the image is captured and object coordinates are generated. The approach worked reliably and improved frame rate considerably.
Conclusion
I felt I hit a wall in speeding up the code and put it on the back burner for awhile. Working up to a 5 or even 10 fps frame rate with an AVR seems like a daunting task. Let alone the 20-30fps some robotic camera systems can achieve.
I am contemplating a processor upgrade, instead of more attempts at optimization. I recently purchased a Parallax Propeller to play with. Another possibility is an inexpensive ARM processor I ran across.
I would like to try using the camera for robust object detection and avoidance and that, most likely, will require greyscale capture. I have a few fast ADCs to experiment with if the ARM or Propeller can't hack it. Even without greyscale, vision-based object avoidance will need a much higher frame rate.