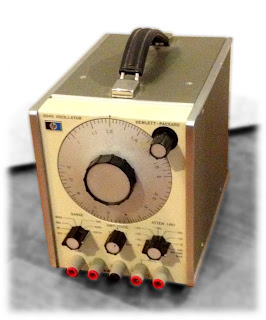
I built a custom power supply for my HP204 oscillator and
Now why would I go and do all that? Read on...
I hacked my HP204D, similar to the HP204C, because the waveform sucked at low frequency settings. Mine was battery operated but the batteries were missing. The power supply circuit was designed to charge those long-gone batteries and, without them, it doesn't supply the correct +13V and -13V voltages.
The transformer output a rather high voltage requiring large, high cost capacitors that wouldn't fit in the case. I discovered this after I cut holes for the big transformer. Oops. I bought a lower voltage transformer and selected cheaper, smaller, shorter input ripple filtering capacitors.
| Smaller transformer, back panel, prototyping regulator |
Some day I may build adjustable positive and negative power supplies with LM317/337 ICs but as an interim fix, I went with +12V/-12V design using 7812 and 7912 regulators.
| Simple home-etched +12V/-12V supply |
After breadboard prototyping, I designed the circuit and layout, etched the board, removed all the original regulator components and tapped into existing +V and -V traces so I didn't have to change the green card edge connector, too.
| Regulator with soft start resistors |
| Regulator tucked in on the internal frame. |
 |
| Drilled a big ol' hole in the back for a fuse holder |
 |
| Fuse wiring |
But guess what. The lowest frequency setting still doesn't look right despite much tinkering with the device's calibrations. All the other frequencies are usable. I'm not positive but I think it has to do with the automatic gain control circuit. If I find out I'll let you know, ok?

No comments:
Post a Comment
Note: Only a member of this blog may post a comment.